Viewing Jennifer data with SQL

Using the Jennifer API server
Jennifer
saves the data collected per second in its own file system.
The file system is developed to process large size data at high speed, and
customer companies are collecting and processing large instance data in a
stable manner. But since the file system is developed on their own, it has some
difficulties in viewing the data in form that a user wants to view.
So, a lot of customers gave us feedbacks that they want to view and use Jennifer data with SQL more freely and the R&D team of Jennifer has been working hard to learn how to improve them and adding new functions as a result.
At present, Jennifer provides two types of SQL viewing methods. In this article, I will show you how to view data by using the Jennifer API server and JDBC driver.
The
Jennifer API server operates as an independent process from the Jennifer
server.
The JDBC driver sends a request received from a user to the API server that
reads the file DB and sends the HTTP responses as results.

Before you can use the Jennifer API, you must check whether the following files exist in the downloaded package.
Each package is downloadable from the following link.
API Server : https://github.com/jennifersoft/jennifer5-api-server
JDBC Driver : https://github.com/jennifersoft/jennifer5-jdbc-driver
Jennifer API server configuration file is called conf/api_server.conf and it is prepared in the yaml format.
apiServer:
   host: "0.0.0.0"
   port: 8080               JENNIFER API server's port number
   authentication:
     id: "jennifer"          Access ID
     password: "jennifer"      Access password
jennifer:
   dataServer:               Data server data
     db:
       - {path: "/home/jennifer/server.data/db_data", name: "default"} dbName
   viewServer:               View server data
     db:

{path: "/home/jennifer/jennifer5-server/db_view", name: "default"}
If you want to view the file DB data of multiple data servers or view servers, then add the directory paths as follows.
db:
  - {path: "/home/jennifer/server.data/db_data", name: "default"}
  - {path: "/home/jennifer/server.data/db_data1", name: "data1"}
  - {path: "/home/jennifer/server.data/db_data2", name: "data2"}
Now, let’s learn how to use the Jennifer API server in an easy way.
First, unzip the jennifer-api-server-{version}.zip file, and then edit the path of the view server or data server in the conf/api_server.conf file to match the path of the user’s JENNIFER DB.
Once you run the bin/api-server (or api-server.bat) file, you can see the following log.
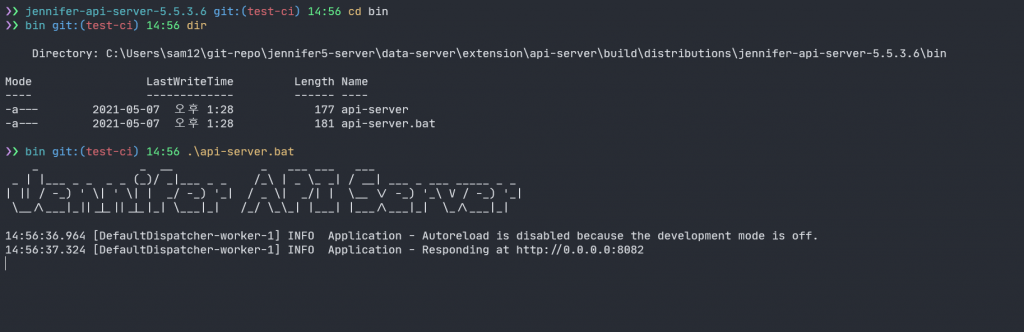
Now, the Jennifer API server is executed, we can view the data
Since it is manufactured with the standard JDBC, we can use it in almost all the DB tools. In this article, we will learn how to use the built-in CLI of the driver, develop additional applications and use DBeaver which is an open-source DB management tool.
First,
this is how to access by using the CLI function provided by the Jennifer JDBC
driver.
As shown in the following, once you run the Jennifer JDBC driver, you can
easily access the Jennifer DB.

Using the SQL statement while the CLI is running, you can view the Jennifer data.
If you want to implement an additional function by managing or viewing the Jennifer DB, you can use DriverManager to view data as follows.
//HTTP can be omitted
- DriverManager.getConnection(“jdbc:jennifer://host:port”)
// In case of port 80
- DriverManager.getConnection(“jdbc:jennifer://host”)
- DriverManager.getConnection(“jdbc:jennifer:http://host:port”)
// If dbName is distinguished
- DriverManager.getConnection(“jdbc:jennifer:http://host:port;dbName=jennifer”)
// When viewing View Server DB
- DriverManager.getConnection(“jdbc:jennifer:http://host:port;dbType=view;dbName=jennifer”)
Next, we will show you how to use the SQL client.
Although there are many different tools, we will use the most widely used open-source called DBeaver for demonstration purposes.
1. .Move the Jennifer JDBC driver to the Driver Manager menu and register it.
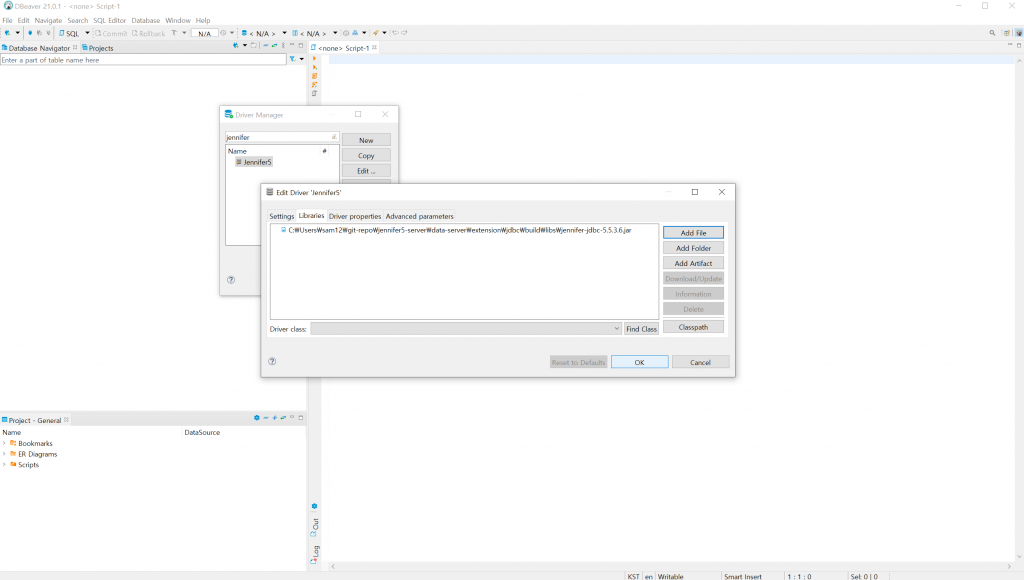
2. Enter the following information for access: Class Name, Host, Port
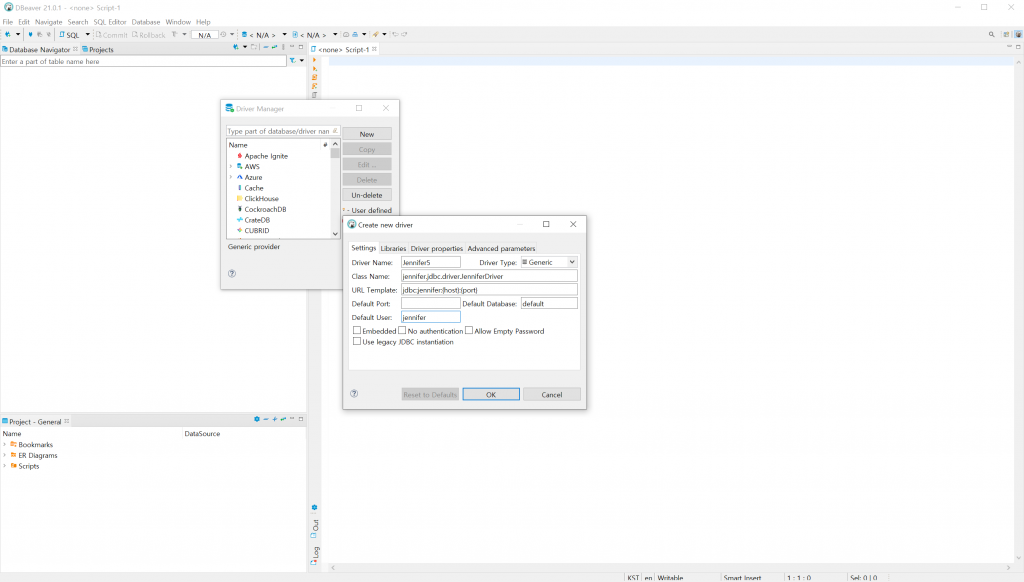
3. In the property tab, register dbType, dbName for access. It is matched to the definition of dbPath added in the API server setting and you can ski this if the single DB path is designated. In this case, dbPath called “default” will be selected.

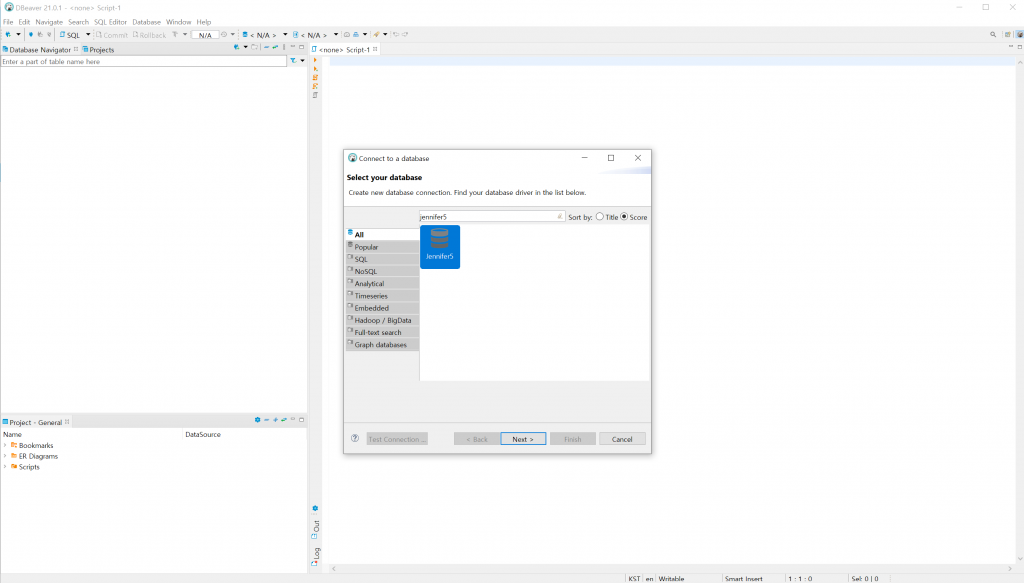
4. In the new DB connection menu, search for the Jennifer5 driver and make a selection.
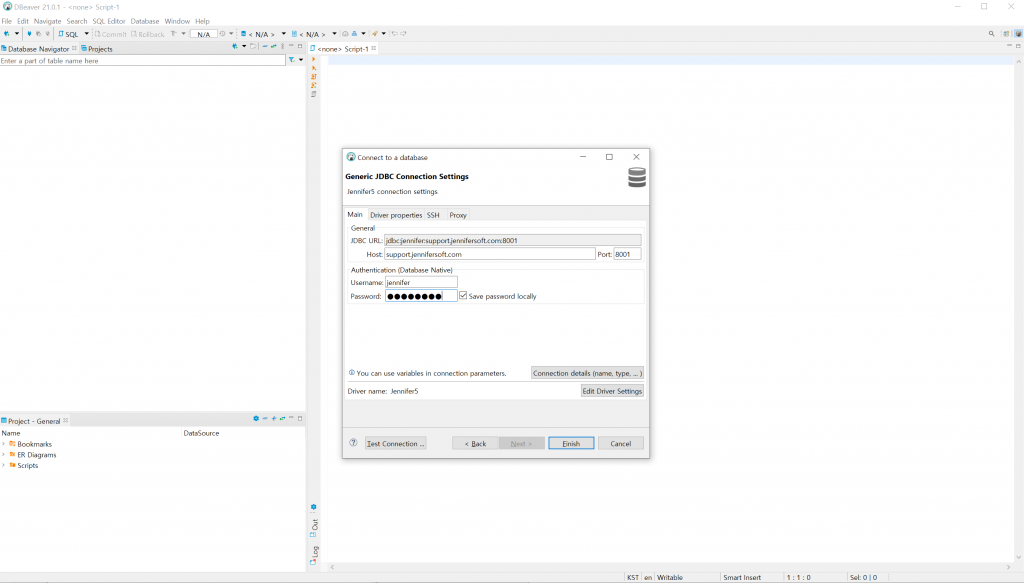
5. Enter the necessary information for access. When you enter the ID/Password, use the one in authenticate area of the AIP server configuration file.
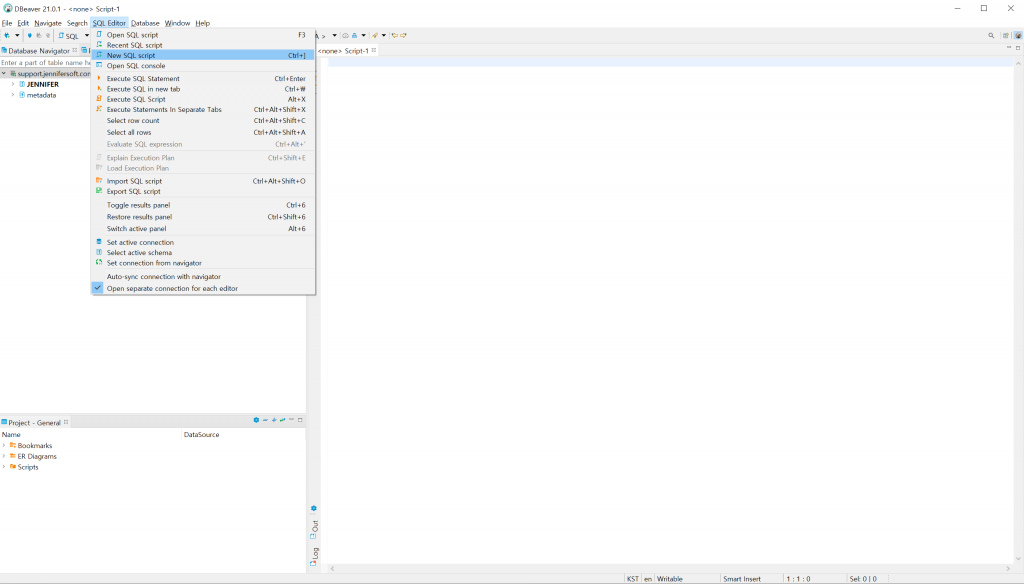
6. Select the new SQL editor.
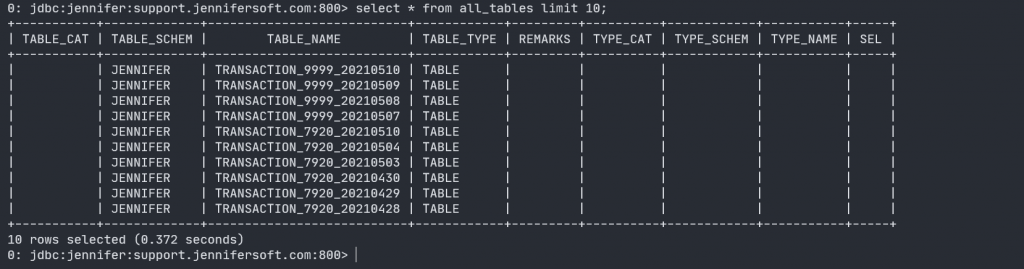
7. Using the SQL (select * from all_tables) prepared ahead of time, you can check the list of tables that you can view. Of course, you can select a schema name to check the information.
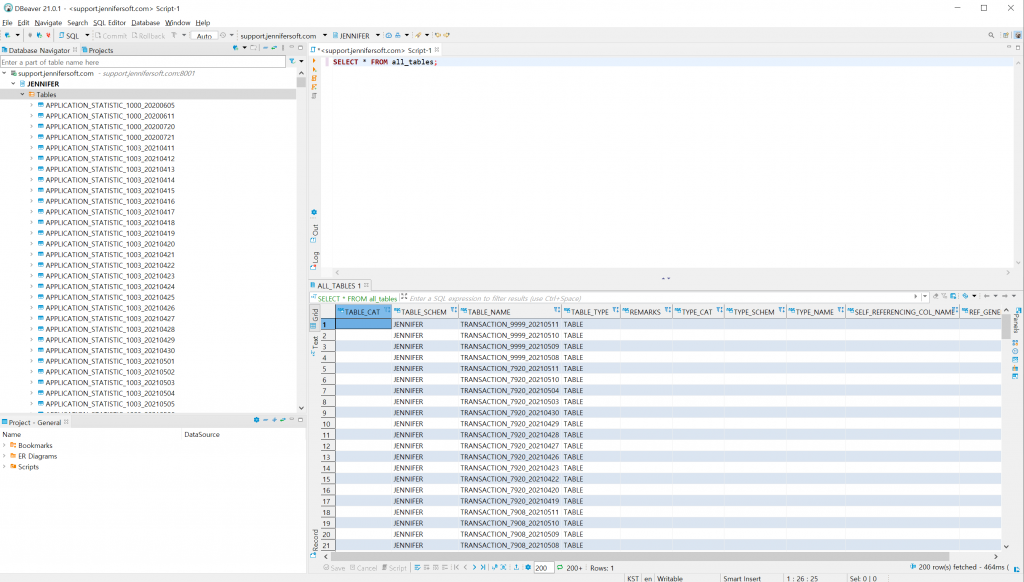
8. You can run SQL that you want for the table that is confirmed.
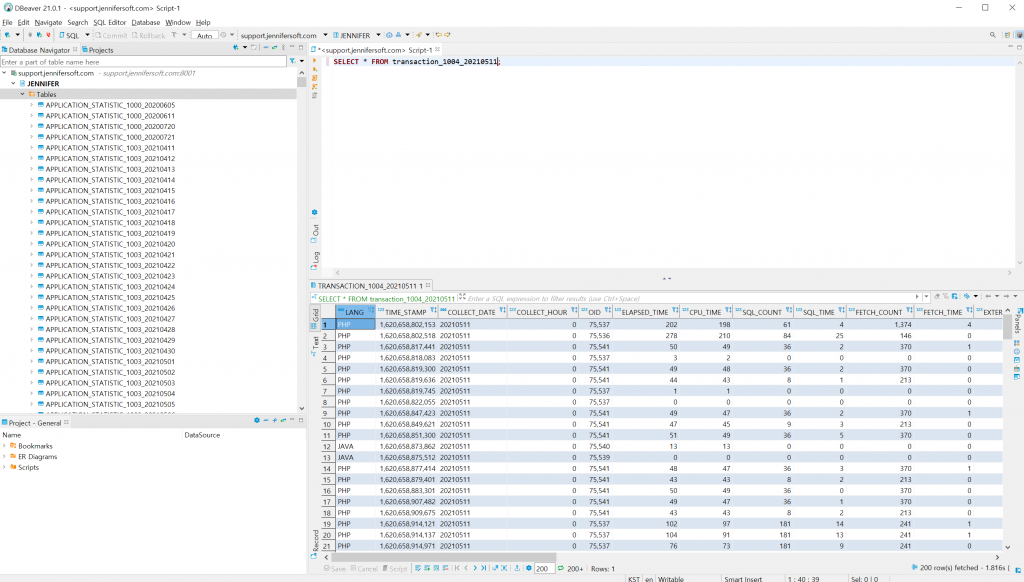
Example of transaction data viewing) select * from transaction_1004_20210401;
You can view the following types of tables now.
| ✔ | APPLICATION_STATISTIC_domain_date |
| ✔ | TRANSACTION_doamin_date |
| ✔ | INSTANCE_METRIC_domain_date |
| ✔ | DOMAIN_METRIC_domain_date |
| ✔ | INSTANCE_domain |
Jennifer JDBC driver is manufactured in accordance with the standard SQL. For more about SQL functions and grammars to use, see the following link.
Now, that
is all I have to say about how to view data with Jennifer API servers and JDBC
drivers.
In the next article, I will introduce you to the second function of “Using
Jennifer data with SQL”
